
No Display After Installing a Graphics Card? How to Fix It
No signal after a GPU upgrade? Check the monitor, power, card seating, drivers and compatibility in a safe order before blaming the graphics card.
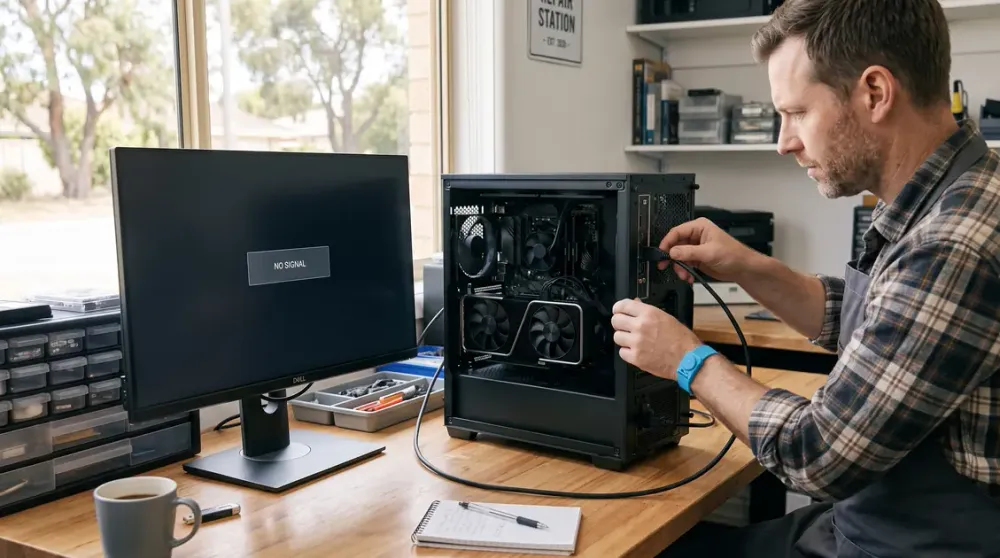
You install a new graphics card, press the power button and the monitor reports No signal. The card may be faulty, but that is not the first conclusion to draw. A display cable connected to the wrong port, an unseated card or a missed power connection can produce exactly the same symptom.
The useful clue is when the failure occurs. If you cannot see the motherboard logo or UEFI screen, concentrate on power, seating, cabling and compatibility. If the picture disappears only when Windows starts, the driver or display settings become more likely. This guide takes you from safe external checks to the point where component testing or professional diagnosis makes more sense.
Key takeaways
- Connect the monitor to the new graphics card, select the matching input and test a known-good cable before opening the PC.
- A black screen before the UEFI or manufacturer logo usually points to hardware, power or initialisation rather than a Windows driver.
- Power down, unplug the PC and protect components from static before reseating anything; never open a power supply.
- Use the card maker's exact power and system requirements, not a generic wattage rule or connector assumption.
- If a known-good card works in the same system, or the new card fails in another compatible system, stop and pursue warranty or repair.
First identify what “no display” means
Do not change several things at once. Note what the computer and monitor actually do, then retest after each reversible change.
- The computer has no power at all: this is broader than a graphics problem. Check the external power lead, wall outlet and power-supply switch. Do not open the power supply or take live electrical measurements.
- The PC powers on but the monitor says No signal: check the selected input, cable destination, graphics-card power and card seating.
- A logo or UEFI screen appears, then the picture vanishes as Windows loads: a driver, resolution or refresh-rate problem is more plausible.
- The picture is corrupted, flickering or covered in blocks or lines: test the cable and monitor first. Persistent corruption during the pre-Windows screen can indicate the card, slot, riser, power or cooling.
- The machine repeatedly restarts or never completes its power-on self-test: diagnostic LEDs or beep codes may identify the affected component; use the motherboard manual because meanings vary.
If there is smoke, a burning smell, sparks, melted plastic, liquid exposure or repeated thermal shutdowns, switch the PC off at the wall and stop. Do not keep power-cycling it to “see if it clears”.
1. Check the monitor, input and display cable
Start outside the case. AMD's current boot-failure guidance likewise begins by checking the monitor, its selected input and the cable before reseating hardware.
- Confirm that the monitor is on and its power indicator is lit.
- Use the monitor's controls to select the exact HDMI or DisplayPort input in use rather than relying on automatic detection.
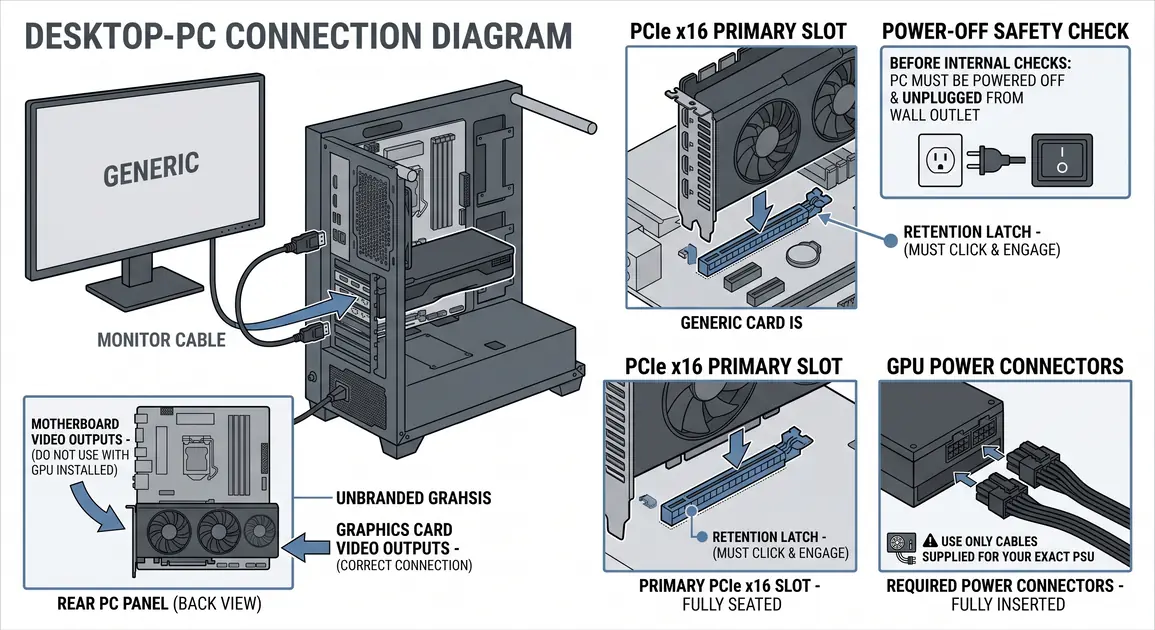
- Make sure the display lead is plugged into a port on the new graphics card, not a motherboard video port. The card's sockets are normally lower on the rear of a tower case.
- Disconnect docks, adapters, splitters, KVM switches and AV receivers for the test. Connect one monitor directly to one graphics-card port.
- Try another output on the card, then a known-good cable and monitor if available.
DisplayPort can occasionally need a fresh handshake after hardware changes. Shut down the PC and monitor, disconnect their power briefly, reconnect one display directly, then start the monitor and PC. Avoid connecting or disconnecting internal components while power is present.
Some CPUs do not include integrated graphics, so a motherboard HDMI or DisplayPort socket may never produce an image. If you deliberately test onboard video, first confirm that the installed processor supports it.
2. Confirm the graphics card and PC are compatible
A card fitting into a PCIe slot does not prove the whole combination is suitable. Before reopening the case, check the exact card model and its manufacturer documentation.
- Power: compare the graphics-card maker's recommended system power with the PSU's labelled model and capacity. Check the required connector type and number. Modern cards may use multiple PCIe plugs or a high-power connector; follow the card and PSU manuals exactly.
- Cables: use only modular PSU cables supplied for that exact power-supply model. Modular connectors are not universally wired, even when they physically fit. Never substitute a CPU/EPS lead for a PCIe lead.
- Physical clearance: check card length, height and thickness, nearby drive cages, radiator clearance and whether the case can close without pressing on a power cable.
- Slot and firmware: use the motherboard's recommended primary PCIe x16 slot. Very old systems can have UEFI, firmware or platform limitations even though PCIe generations are generally designed for interoperability.
- Cooling: the card needs clear airflow. Perth summer room temperatures can reduce cooling headroom, but ambient heat does not explain a completely cold first boot as often as a missed cable or poor seating.
Integrated graphics versus a dedicated card, gaming resolution, VRAM and brand features matter when choosing a GPU, but they do not change this diagnostic order. For a future upgrade, match the card to the games or applications, monitor resolution, case, PSU and CPU rather than buying on VRAM or brand alone.
3. Power down safely and reseat the card
Only proceed if you are comfortable working inside a desktop and the warranty permits it. Otherwise, arrange hardware help. AMD's removal guidance calls for shutting down attached devices, disconnecting cables and controlling static before handling the card.
- Shut Windows down if possible. Turn off the PC and monitor, switch the PSU off, unplug the mains lead and disconnect peripherals.
- Move to a clear, dry work surface. Discharge static using a correctly grounded antistatic strap or follow the system manufacturer's handling instructions. Do not work on carpet.
- Photograph the existing cable layout before changing it.
- Remove the side panel. Confirm the card's bracket is aligned and the card is fully inserted in the motherboard's primary PCIe slot. The retention latch should be engaged, but do not force it.
- Check every required graphics-card power plug. It should be fully seated, with no visible gap, scorching or damaged pins. Follow the connector manufacturer's bend-clearance instructions and do not sharply fold a cable at the plug.
- If a PCIe riser or vertical-mount cable is present, remove it for diagnosis and fit the card directly in the primary slot. AMD includes this isolation step in its current no-display troubleshooting.
- Refit the panel, reconnect one monitor to the card and test.
Do not probe a PSU, open its enclosure or use improvised adapters. A power supply can retain dangerous energy after it is unplugged. If wattage, cable identity or connector damage is uncertain, have the PSU and card checked by a competent technician.
4. Use startup clues to narrow down the fault
If the screen is still blank, the computer may be telling you where startup stopped.
Look for labelled motherboard debug LEDs such as CPU, DRAM, VGA and BOOT, a two-digit diagnostic display, or an established beep pattern. Record the light or code rather than guessing. Then consult the exact motherboard or prebuilt-PC manual; a “VGA” light can indicate that graphics initialisation failed, but it does not prove the card itself is defective.
Also check whether keyboard lights respond, whether Windows startup sounds play, and whether the PC stays running. A machine that reaches Windows with no picture suggests a display path problem. A machine that continually restarts may have a broader power, memory, motherboard or firmware fault.
If the old graphics card still works, reinstalling it is a valuable comparison. If onboard graphics is genuinely supported, removing the new card and testing the motherboard output can also establish whether the rest of the PC boots. These are isolation tests, not permanent fixes.
5. Fix drivers only if the PC can reach Windows
A driver cannot normally prevent the firmware logo from appearing because Windows has not loaded yet. Driver work belongs here only when you can obtain a picture through Safe Mode, the old card or supported integrated graphics, or when the display fails as Windows starts.
First save open work and make sure important files are backed up. Identify the exact card in Device Manager or from its label, then obtain the compatible driver from Windows Update or the GPU manufacturer's official site. Microsoft advises avoiding third-party driver-download websites in its current Device Manager guidance.
In Windows 11 or Windows 10:
- Right-click Start and open Device Manager.
- Expand Display adapters and inspect the new card's status.
- If the problem began immediately after a driver update, open Properties > Driver > Roll Back Driver when that option is available.
- Otherwise install the correct current package from NVIDIA, AMD or Intel, following its prompts, then restart.
For flicker or a scrambled image after Windows loads, Microsoft also documents Windows key + Ctrl + Shift + B as a way to reset the graphics driver. It will not repair a loose card or missing power connection. Uninstalling a driver can temporarily reduce resolution and features; do it only when rollback or a normal update has not helped, and have the replacement package available.
Avoid generic “driver updater” utilities. Also avoid overclocking while diagnosing: return GPU, CPU and memory settings to supported defaults so one unstable setting does not hide another fault.
6. Treat BIOS or UEFI changes as an advanced step
Firmware advice in older troubleshooting guides is often too casual. Do not update the BIOS merely because the screen is blank. An interrupted or incorrect update can leave the motherboard unable to boot, and BitLocker may ask for its recovery key after firmware or security-setting changes.
If the old card works and the motherboard manufacturer specifically lists a firmware update for GPU compatibility, read the instructions for the exact board revision. Confirm backups and access to the BitLocker recovery key before changing firmware. Use only the manufacturer's supported update method and stable power. If you cannot confidently identify the board, firmware file or recovery key, stop and seek help.
Do not routinely disable integrated graphics. Most current systems select an installed card automatically, and keeping onboard graphics available can be useful for diagnosis. A primary-display setting such as Auto, PCIe or PEG may be relevant on some boards, but names and behaviour vary; follow the board manual rather than copying a generic menu path. Clearing CMOS is also not a harmless universal fix because it resets firmware settings and may affect boot, storage and security configuration.
7. Check for overheating only when the symptoms fit
Overheating is more likely when the PC works initially, then loses display, throttles, crashes or shows artefacts under load. It is less likely when a newly installed, cold card has never displayed anything.
Check that fans can turn freely, vents are not blocked and the case is not enclosed in a cabinet. Remove dust with the PC powered off and unplugged, keeping fans from free-spinning under compressed air. Monitor temperature with the card maker's software and compare results with the limits and normal behaviour published for that exact model; there is no single safe temperature threshold for every GPU.
Return any overclock or undervolt to default during testing. Replacing a GPU cooler, thermal pads or thermal paste can damage the card and may affect warranty, so it is technician-level work rather than a first-line fix. Stop immediately for smoke, burning smells, damaged connectors or repeated thermal shutdowns.
8. Run controlled swap tests
Swap testing provides stronger evidence than repeatedly reseating the same parts, but only use components known to be compatible.
- Test the new card in another suitable PC with adequate power and the correct cables.
- Test a known-good compatible card in the original PC.
- If the motherboard has another full-length slot, use it only if the manual supports that configuration; performance may be reduced, but it can help isolate a damaged primary slot.
- If the old card works but the new card fails in two compatible systems, the new card is the leading suspect. Contact the retailer or manufacturer rather than dismantling it.
- If neither card works in the original PC, investigate the motherboard, PSU, memory and firmware rather than assuming two failed GPUs.
AMD's troubleshooting guidance also recommends a known-good graphics-card swap when feasible. PSU substitution should be left to someone who can verify capacity and use only the replacement PSU's own modular cables; never reuse modular leads from the old unit.
When to stop and get help
Stop before a risky experiment becomes a more expensive repair. Professional diagnosis is sensible when the card or connector shows heat damage, the PSU cables cannot be positively identified, the PC fails its power-on self-test, firmware recovery is being considered, or no compatible parts are available for controlled testing.
For Perth homes and small businesses, this is normally an onsite hardware job rather than a remote-support job: the technician needs physical access to check seating, power and known-good components. Perth Computer Experts' custom PC builds and hardware upgrades service covers graphics-card faults, compatibility and cooling checks. Bring the card model, PSU model, motherboard model, any debug code and a note of the tests already completed; that evidence shortens the diagnosis and helps preserve warranty options.