
Motherboard Diagnostic Tools: 7 Tools and a Safe Process
Learn what seven motherboard diagnostic tools can reveal, how to test safely, and when repair, replacement or professional diagnosis makes sense.
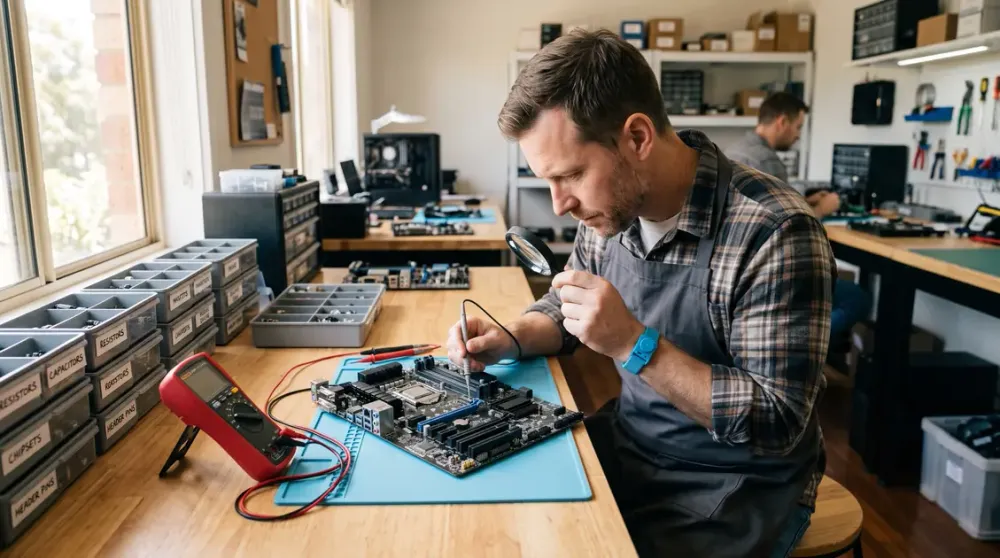
A motherboard sits at the centre of a PC, so a fault in almost any connected part can make the board look guilty. A computer that will not start, has no display, restarts unexpectedly or loses USB devices may have a motherboard problem ”but it may just as easily have bad memory, a weak power supply, overheating, a loose cable or a failed graphics card.
The useful question is therefore not Which gadget proves the motherboard is dead? No single tool does that reliably. Accurate diagnosis comes from using the right motherboard diagnostic tools in a safe order, comparing results with the board's own manual, and ruling out simpler causes before replacing parts.
This guide explains seven useful tools, what each can and cannot tell you, a practical diagnostic sequence, and how to decide whether repair, replacement or professional testing makes sense.
Key takeaways
- A motherboard diagnosis is usually a process of elimination, not a single definitive test.
- Start with the manual, visual inspection and built-in POST indicators before buying specialised equipment.
- A known-good power supply and RAM testing often reveal faults that only appear to be motherboard failures.
- Live electrical probing, oscilloscope work, soldering and opening a power supply belong with a competent technician.
- Confirm compatibility, data access and total upgrade cost before choosing repair or replacement.
Why motherboard faults are difficult to diagnose
The motherboard connects the processor, memory, storage, graphics, firmware, power supply and external ports. If the PC stops during its power-on self-test (POST), the failed stage could involve the component being checked, its power or data connection, the firmware configuration, or the board itself.
Symptoms are clues, not verdicts. No lights or fans can indicate a wall-power, cable, case-switch, PSU or motherboard problem. A blank screen can come from RAM, a graphics card, the monitor or a processor without integrated graphics. Random crashes can be software-related or caused by heat, memory, storage, power delivery or another hardware fault. Microsoft's Windows Hardware Error Architecture (WHEA) records hardware error information from sources including processors, memory and PCI Express devices; that makes the log useful evidence, but a WHEA entry alone does not prove the motherboard has failed (Microsoft Learn).
Write down the exact behaviour before changing anything: what happens when the power button is pressed, which lights stay on, whether fans spin, any beep or two-digit code, how long the PC runs, and what changed immediately before the fault. This baseline prevents several changes from obscuring the result.
Seven motherboard diagnostic tools and what they reveal
1. The motherboard manual and a good light
The manual is the first diagnostic tool because it identifies the correct RAM slots, power connectors, clear-CMOS method, supported processors and the meaning of that model's indicators. A torch or inspection light then helps reveal loose plugs, foreign objects, bent socket pins, damaged ports, scorch marks or leaking components.
Shut down, switch off at the wall, unplug the PC and allow it to cool before opening a desktop case. Avoid touching contacts, and discharge static by touching an earthed metal part of the case before handling components. Stop immediately if there is smoke, a burning smell, sparks, liquid exposure or obvious heat damage. Do not energise damaged hardware to see what happens.
Visual evidence can justify stopping, but an intact-looking board can still be faulty. Conversely, dust is evidence of poor cooling, not proof that the motherboard itself has failed.
2. Built-in POST LEDs, postcode displays and beep codes
Many boards expose the stage at which POST stopped through labelled LEDs, a two-digit display or beep patterns from a connected speaker. These can focus attention on CPU, DRAM, graphics or boot-device initialisation. ASUS, for example, describes its Q-LED result as the most probable cause and a starting point for troubleshooting ”not a final diagnosis (ASUS motherboard manual).
Record the exact indicator and consult the manual for the exact board model. Codes are not universal. A DRAM light may mean an unseated or failed memory module, an unsupported setting, a CPU memory-controller problem, a socket contact issue or a damaged board trace. Test the likely causes rather than replacing the board based on the label alone.
3. A POST diagnostic card
A compatible POST card displays firmware postcode values while a system starts. It can be helpful on a desktop with no useful onboard display, particularly on a test bench where a technician knows the platforms postcode sequence.
Compatibility is the catch. The card must support the available interface and the system must actually output usable codes through it. Modern boards may provide more useful onboard diagnostics, while laptops and highly integrated systems often do not expose a suitable slot. Interpret every code through documentation for the specific motherboard or firmware; a halted code identifies a stage, not necessarily the failed part.
4. A PSU tester or known-good power supply
Power faults frequently imitate motherboard faults. A plug-in PSU tester can confirm that main ATX connectors are present and that reported rails are broadly plausible. A correctly rated, compatible, known-good PSU is a stronger substitution test because it shows whether the system behaves normally under real load.
A simple tester does not reproduce every transient or load condition, and a fan spinning does not prove a PSU is healthy. Modular PSU cables are not universally interchangeable: use only the cables specified for that exact PSU. Never open a power-supply enclosure. Its internal capacitors can retain dangerous energy after disconnection.
Home users should not back-probe a powered 24-pin connector or make live measurements inside a PC unless trained and equipped for the work. If a basic external test is inconclusive, a technician can use a bench supply, multimeter and load testing safely.
5. A multimeter ”for competent, de-energised checks
A digital multimeter can check simple continuity and resistance on equipment that is disconnected from power, and a technician can use it for voltage and short-circuit diagnosis. It is valuable because it measures rather than guesses, but a wrong range, probe slip or unsuitable reference point can short adjacent contacts or damage the board.
For an ordinary PC owner, keep multimeter work to procedures explicitly documented by the manufacturer and performed with power removed. Do not probe CPU-socket, voltage-regulator or other board test points, and never measure inside the PSU. Live rail measurement and board-level short finding are technician tasks.
6. Bootable memory testing and substitution parts
Memory errors commonly cause failed boots, freezes and crashes. Testing one module at a time in the manuals recommended slot can reveal whether the symptom follows a module or a slot. If the system can boot from USB, MemTest86 applies several data patterns and algorithms to detect memory errors (MemTest86 technical information).
An error still needs interpretation. It can arise from the DIMM, its settings, the CPU's memory controller, a socket/contact problem or the motherboard slot and traces. Return overclocked memory to supported defaults before drawing conclusions. A known-good compatible DIMM, GPU or PSU is often more informative than generic system health software because it isolates one variable.
Protect important data before extended testing on an unstable computer. If the machine repeatedly crashes, overheats or has storage errors, continued testing can worsen downtime or corruption.
7. Monitoring, logs and technician bench instruments
When Windows runs, firmware or reputable monitoring utilities can show fan speeds and temperature sensors. Windows Event Viewer can provide WHEA hardware error records. Use trends and repeated events as evidence, but remember that software sensor names and readings depend on firmware and board support. CPU-Z identifies components and settings; it does not certify motherboard health.
An oscilloscope, thermal camera, bench supply and boardview or schematic can help a repair technician trace unstable power rails, clocks, signals and localised heat. These tools are appropriate for component-level work only when the operator knows the expected waveform, safe probing method and circuit. They replace neither isolation nor documentation, and they are not reasonable DIY purchases for a one-off diagnosis.
The old idea of a motherboard stethoscope is not a dependable diagnostic method. Coil whine or fan noise may help locate a sound, but listening cannot identify a failed capacitor or prove a circuit fault.
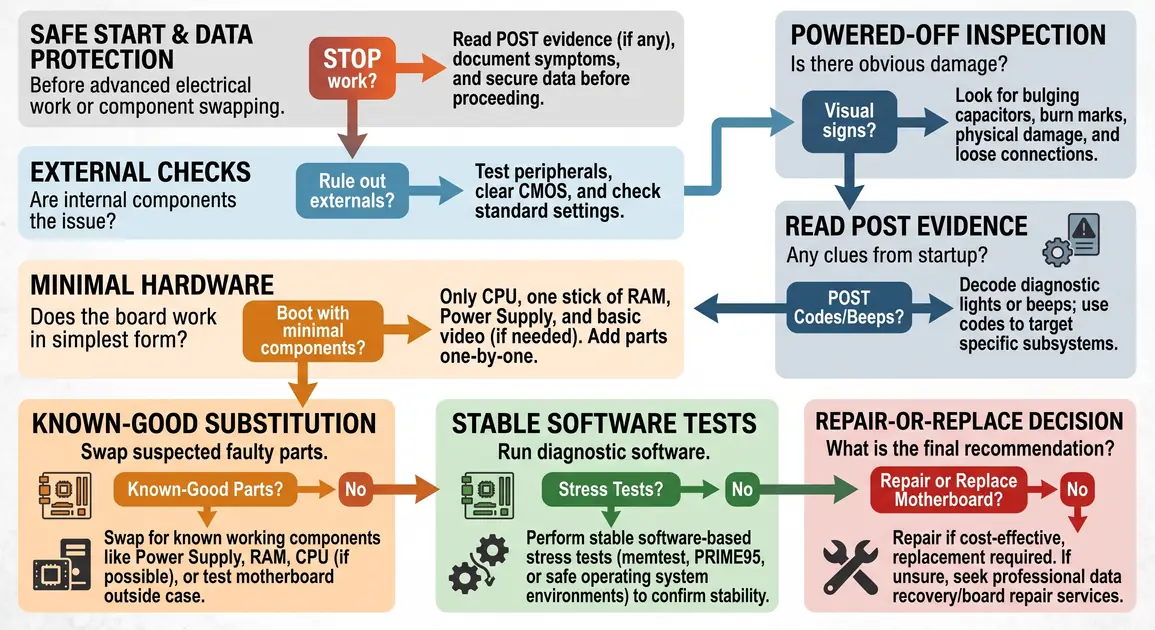
A safe diagnostic sequence
Use the tools in an order that moves from observation to controlled substitution. Change one thing at a time and record the outcome.
- Protect people and data. Stop for burning, smoke, sparks, liquid damage, a swollen battery or repeated thermal shutdowns. If important files exist only on this machine, prioritise backup or data recovery before stressful testing, firmware work or parts replacement.
- Confirm the external basics. Test the power point with another appliance, check the power lead, monitor input and PSU switch, and disconnect unnecessary USB devices. Verify that the case power-button lead has not come loose.
- Inspect with power removed. Check the main 24-pin and CPU power connectors, cooling fans, RAM and graphics card seating. Look for damage without touching socket pins or forcing connectors.
- Read POST evidence. Note LEDs, postcode displays and beeps, then use the board manual. Do not assume a CPU or DRAM label proves that component is defective.
- Reduce to minimum hardware. On a serviceable desktop, disconnect extra drives and add-in devices. Test the CPU, cooler and one compatible RAM module, plus graphics only if the processor lacks integrated graphics. Add items back one at a time. Laptop disassembly and systems under warranty are better left to authorised service.
- Test the likely substitute. Try one RAM module and slot at a time, then a compatible known-good PSU or graphics option where available. Never mix modular PSU cables.
- Use software only if the PC is stable enough. Run a memory test, check temperatures and review repeated WHEA events. A crash during one test is a clue, not automatic proof of a motherboard fault.
- Reset firmware settings only when justified. First photograph or record custom settings, including storage mode, fan curves and memory settings. Confirm any BitLocker recovery key is available because firmware changes can trigger a recovery prompt. Follow the exact manual. ASUS confirms that clearing CMOS resets date, time, BIOS password and setup parameters (ASUS support).
A BIOS/UEFI update is not a general-purpose motherboard test. Use one only when the manufacturers release notes address the fault or hardware support issue, and follow the exact model-specific process with stable power. Do not interrupt it; a failed firmware update can leave the computer unable to boot (ASUS support).
Overheating: measure the right component
People often say the motherboard is overheating when the actual hot component is the CPU, graphics card, storage device or motherboard voltage-regulator module (VRM). Check which sensor is high and compare it with the component manufacturers specification. There is no single safe motherboard temperature that applies to every model.
Warning signs include fans running unusually hard, performance dropping under load, heat-related restarts, or a system that shuts down after warming up. Intel's thermal guidance emphasises a correctly mounted heatsink and effective airflow through the chassis; it also lists reboots, crashes and failure to boot among possible cooling-fan symptoms (Intel Support). These symptoms still have other causes.
With the PC unplugged, clear dust using controlled compressed air while preventing fans from free-spinning. Keep vents clear and confirm that fans turn normally. Do not use a household vacuum directly on components. Replacing a fan or renewing thermal paste requires correct disassembly and mounting; if you are unsure, use a technician, especially for a laptop.
Perth hot summer room temperatures reduce the cooling systems margin. Keeping a desktop out of direct sun and enclosed cabinetry, leaving space around vents, and addressing dust before sustained hot weather are practical local measures. If the system repeatedly shuts down from heat, stop running heavy workloads until the cause is corrected.
When the evidence points to the motherboard
Confidence increases when the fault remains after external power, RAM, graphics, cooling and connected devices have been tested with compatible known-good alternatives; POST evidence repeatedly stops at the same stage; and the same components work in another compatible system. Visible board damage, failed ports across clean software environments, or a confirmed board-level rail or signal fault can add evidence.
Even then, distinguish the motherboard path is implicated from this chip is definitely dead. CPU socket damage, firmware corruption and a failed onboard device are all motherboard-related but lead to different repair decisions.
Motherboard repair or replacement?
Use five factors rather than an arbitrary age or price threshold:
- Fault and repairability: Firmware recovery or a replaceable connector may be viable; burnt multilayer traces, extensive corrosion or an unavailable integrated component may not be.
- Parts and compatibility: A replacement must match the processor socket and supported CPU, RAM generation and form factor, while providing the required storage, graphics and external connections. A newer board may force CPU, RAM, cooler or case changes.
- Data and licensing: Storage normally retains user files, but firmware security settings, BitLocker recovery, drivers and Windows activation may need attention. Back up first and confirm recovery keys.
- Warranty and labour: Check the computer and board warranty before opening, soldering or buying parts. Compare a written repair assessment with the installed cost and warranty of replacement.
- The rest of the computer: A board replacement can be sensible when the remaining parts meet the user's needs. If several core components are obsolete or unreliable, a planned upgrade may provide better value.
Component-level capacitor replacement and soldering need suitable equipment and proven electronics skills. Cleaning dust is maintenance, not a repair for an electrically failed board. Similarly, updating drivers may fix a peripheral or software problem but does not repair physical motherboard damage.
For a confirmed fault, Perth Computer Experts can help with computer repair and troubleshooting. If replacement affects several components, compare it with a custom PC build or hardware upgrade before spending money. The aim is a defensible diagnosis first, followed by the least disruptive option that fits the computers condition and your needs.