
How to Test and Monitor Your PC's Cooling Performance
Learn how to monitor PC temperatures, run a controlled load test, interpret throttling, improve airflow and clean dust safely.
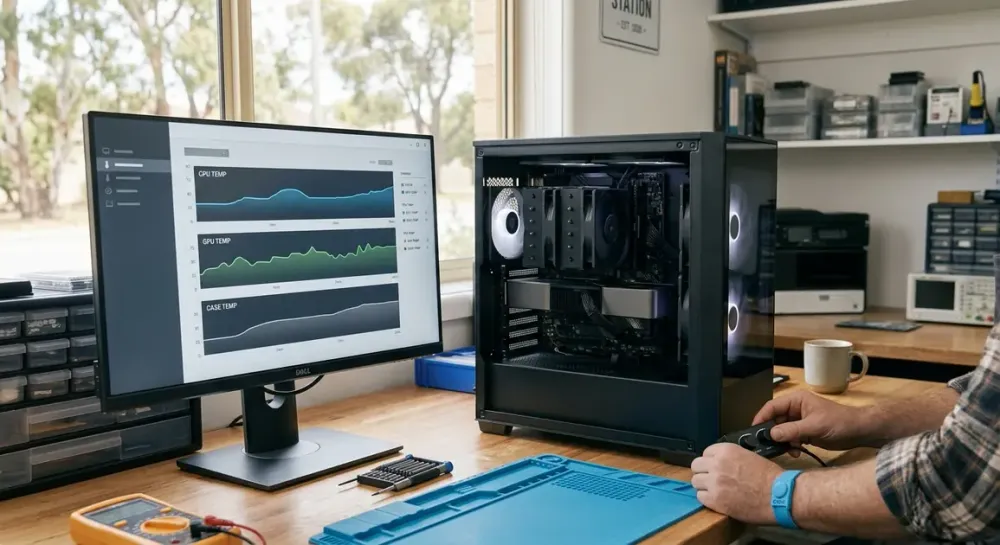
A PC can feel perfectly normal at the desktop yet slow down, stutter or shut off when a game, video export or other demanding job heats it up. A single temperature reading rarely tells the whole story: the useful question is whether temperatures, clock speeds and cooling behaviour remain stable during the work the computer actually performs.
This guide shows you how to establish a baseline, run a controlled cooling test, interpret the results and deal safely with dust or airflow problems. It is written for desktop PCs; laptop owners should stick to external vent cleaning and their manufacturer's service guidance rather than opening the machine unless they are trained and equipped to do so.
Key takeaways
- Compare repeatable idle and load tests instead of judging cooling from one temperature reading.
- Use the exact CPU, GPU or computer manufacturer's thermal limits; there is no universal safe temperature for every PC.
- Watch clocks, fan or pump speed, power and throttling alongside temperature to identify the real problem.
- Clean vents and filters safely before buying new cooling hardware, but never open a power supply.
- Stop testing if the PC repeatedly shuts down or you notice smoke, sparks, a burning smell, liquid or a swollen battery.
What a useful cooling test measures
Processors and graphics cards produce more heat as their workload and power use rise. Modern components manage that heat by changing fan speed, clock speed and power. If a component reaches its configured thermal limit, it may reduce frequency or power—a protective behaviour called thermal throttling. Intel explains that its maximum junction temperature varies by processor and that the CPU can throttle or shut down if it cannot maintain a safe operating temperature (Intel temperature guidance). Other CPU and GPU families have their own limits.
That is why “keep everything below 80°C” is not a reliable rule. A reading can be expected for one model and concerning for another, while a laptop and a large desktop may behave very differently. Look up the specification or support guidance for your exact processor, graphics card and pre-built computer. Then assess four things together:
- Temperature: current, maximum and, where available, average CPU and GPU readings.
- Performance: CPU/GPU clocks and a consistent workload score or frame rate.
- Cooling response: whether fan speeds rise smoothly and, on a liquid cooler, whether a pump-speed reading is present and stable.
- Limit indicators: thermal-throttling, thermal-limit or power-limit flags reported by the monitoring tool.
A cooling problem is more convincing when the same workload now runs hotter, noisier or slower than a previous clean baseline, or when temperature rises towards the model-specific limit while clocks fall.
Before you start: make the test safe and repeatable
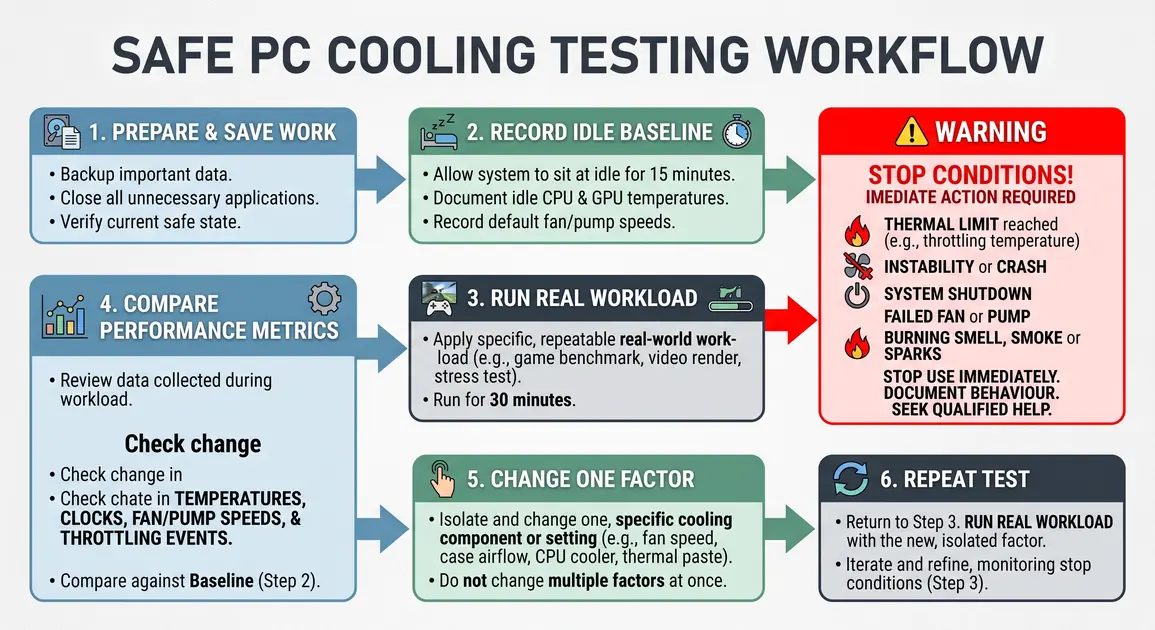
Save open work first. A genuinely unstable PC can crash or shut down during a load test, so do not use unsaved documents or an important production task as your benchmark. If the computer has already suffered thermal shutdowns, confirm that important files are backed up before further diagnosis.
Next, return the system to a known state:
- Remove any recent manual overclock, undervolt or custom power setting for the first test. If you are not certain how a BIOS/UEFI change was made, do not guess or reset firmware settings blindly; ask a technician or the system builder.
- Put the desktop upright on a firm surface with clear space around its intake and exhaust vents. Do not test it inside a closed cabinet.
- Note the room conditions. Perth summer heat can raise the air temperature entering the case, so compare tests conducted in similar room temperatures rather than treating a hot-day result as directly equivalent to a winter baseline.
- Check from outside that vents are not blocked and that visible fans start. Do not put fingers or tools near moving blades.
- Close unnecessary applications so the baseline is repeatable. Leave normal security software enabled.
Stop immediately if you smell burning, see smoke or sparks, find liquid exposure or a swollen battery, hear electrical crackling, or encounter exposed mains wiring. Switch the computer off if safe to do so, disconnect it from the wall and seek qualified help. Never open a desktop power-supply unit: it can retain dangerous energy after being unplugged.
Step 1: choose a monitoring tool and the right sensors
Use one trusted monitoring application at a time. Multiple tools can label sensors differently or compete for low-level sensor access, which makes the result harder to interpret.
For a broad Windows view, HWiNFO can show current, minimum, maximum and average sensor values and log them over time (HWiNFO features). AMD Ryzen Master provides current and peak CPU temperature and clock information for supported Ryzen processors (AMD Ryzen Master). Manufacturer utilities supplied with a pre-built PC or motherboard can also be appropriate, especially for fan and pump readings.
Select or record these sensors where your hardware exposes them:
- CPU package temperature or the vendor-designated representative CPU temperature;
- GPU temperature and, if available, GPU hotspot temperature;
- CPU and GPU clock speeds, utilisation and power;
- CPU, case and radiator fan speeds in RPM;
- liquid-cooler pump speed in RPM, if applicable; and
- thermal-throttling or thermal-limit indicators.
Not every motherboard reports every fan or pump, and a missing reading does not by itself prove failure. Confirm the header, cooler software and motherboard documentation before drawing a conclusion.
Step 2: record an idle baseline
Restart the PC, wait about 10 minutes without launching demanding programs, then reset the monitoring tool's minimum and maximum values. Record the room temperature if you can, followed by the CPU and GPU temperatures, clocks, utilisation and fan speeds.
Idle readings are useful for comparison, but they are not a pass/fail test. Background updates, fan-stop modes and modern boost behaviour can produce short spikes. An unexpectedly warm idle result is a prompt to check background CPU/GPU use, fan operation, cooler mounting and airflow—not proof that a component is damaged.
Keep this baseline with the date, room conditions and PC configuration. It becomes much more valuable after a cleaning, cooler adjustment or seasonal change.
Step 3: test the workload that causes the problem
Start with the real application that exposes the symptom: the affected game, video render, design program or sustained work task. This produces a more relevant result than immediately applying an extreme synthetic load.
Run the same scene, project or task for 15 to 30 minutes while logging sensors. Watch for:
- temperature rising and then settling into a reasonably steady range;
- fan speed increasing as heat builds;
- stable performance after the initial warm-up;
- temperature repeatedly reaching the component's documented limit;
- clocks or performance falling as a thermal flag appears;
- a fan reporting zero RPM when it should be running; or
- an AIO pump reading disappearing, fluctuating sharply or being accompanied by unusual gurgling or grinding.
Stop the test if temperature reaches the documented limit and stays there while performance drops, if the system becomes unstable, or if a fan or pump appears to have failed. Repeatedly restarting a computer that thermally shuts down can turn a diagnosable fault into data loss or hardware damage.
Step 4: use a controlled stress test only if needed
If the real workload passes but you need to check sustained cooling capacity, use a reputable benchmark or stability tool from its official source. A CPU-only test helps isolate the processor cooler; a GPU-only test focuses on the graphics card; a combined test creates more case heat and power demand. Do not begin with the harshest setting.
Run a short test first, monitor it continuously and extend it only if readings stabilise below the hardware's documented limits. A stress test deliberately creates a heavy load and can trigger a crash or shutdown on a faulty system. It cannot prove that every application will be stable, and comparing scores is meaningful only when the workload, settings, drivers, room conditions and power configuration are the same.
Avoid stress testing a PC that already shuts down, has an unreliable power supply, contains important data without a verified backup, or shows any electrical warning sign. Overclocking and voltage tuning are separate advanced tasks; changing them during diagnosis introduces another variable and can increase heat or instability.
Step 5: interpret the temperature, clocks and noise together
Use patterns rather than an isolated peak:
- Hot but stable at the maker's expected limit: some modern processors use available thermal headroom to boost. Check the exact specification and whether clocks remain consistent before assuming a fault.
- Temperature climbs while clocks fall and a thermal flag appears: the component is throttling. Intel describes throttling as a protective reduction in clock speed when a thermal limit is reached (Intel throttling guidance).
- CPU hot, GPU normal: investigate the CPU cooler, its fan or pump, mounting and CPU-heavy background tasks.
- GPU hot, CPU normal: check the graphics-card fans, heatsink airflow and GPU workload. Do not dismantle a graphics card unless you are competent to do so.
- CPU and GPU both hotter than before: case airflow, dust, room temperature or a slow case fan is more likely than two simultaneous cooler failures.
- Temperature acceptable but performance low: power limits, software, drivers, storage, memory or the workload itself may be responsible. Cooling is only one possible cause.
- New rattling, grinding or clicking: inspect for a cable touching a fan and identify the noisy part. A worn fan bearing or failing pump generally needs replacement.
For the cleanest comparison, change one thing at a time and repeat the same test. Record maximum and average temperatures, average clocks, fan speed and workload result—not just the most alarming number on screen.
Dust and airflow: inspect before you upgrade
Dust on filters, vents, fan blades and heatsink fins restricts airflow and can make fans work harder. Dell's current troubleshooting guidance lists blocked vents, dust accumulation and inadequate ventilation among common causes of fan noise and overheating, and recommends powering off and disconnecting the computer before using compressed air (Dell fan troubleshooting).
Look through the vents with the PC off. Check for a matted intake filter, a heatsink packed with dust, a disconnected fan, a cable obstructing a blade or a radiator whose fins are blocked. Also confirm airflow has somewhere to go: adding fans will not help much if a solid front panel or a wall blocks the intake.
Air cooling and all-in-one liquid cooling can both work well when correctly sized and installed. Liquid cooling is not automatically quieter, safer or more effective for every PC; it adds a pump and more potential failure points. Choose or upgrade cooling according to the processor's heat output, case clearance, noise target and workload rather than assuming one cooler type always wins.
How to clean a desktop PC safely
Start with the least invasive cleaning. Follow the computer or case manufacturer's instructions, especially while the product is under warranty.
- Shut Windows down fully. Turn the power off at the wall, unplug the power lead and disconnect peripherals.
- Move the desktop to a dry, well-ventilated work area. Avoid carpet, and discharge static by touching an earthed metal object before handling internal parts. An anti-static wrist strap is useful when it is correctly connected to earth.
- Remove and clean accessible dust filters. Use a soft brush or compressed air outdoors, then ensure each filter is completely dry before refitting it.
- If the case documentation allows user access and you are comfortable removing the side panel, keep the compressed-air can upright and follow its label. Use short, controlled bursts. Hold each fan blade still so it is not driven at excessive speed.
- Direct loosened dust out of the case. Do not push a nozzle against components, spray liquid or propellant onto electronics, use your breath, or use a household vacuum inside the PC. Dell warns that blowers and vacuum cleaners may create static and damage electronics.
- Do not open the power supply. Clean only its external grille with controlled compressed air while the computer is unplugged.
- Check that no cable has been loosened, refit the panel and filters, reconnect the PC, then repeat the same baseline and workload test.
Cleaning frequency depends on the environment. A home with pets, nearby renovation dust, smoke or a PC positioned close to the floor may need more frequent filter checks than a clean office. Inspect filters periodically and clean when buildup is visible rather than relying on an arbitrary quarterly schedule.
Fan curves, case airflow and thermal paste
If cleaning improves airflow but the PC remains noisy or hot, check fan control in the motherboard or system-maker utility. A useful fan curve increases cooling progressively with temperature without jumping rapidly between speeds. Save the original profile before changing anything and make small, reversible adjustments. Do not stop a required fan or pump merely to make the computer quieter.
Most tower cases are arranged with cooler air entering at the front or bottom and warm air leaving at the rear or top, but the correct arrangement depends on the case. Maintain a clear path across hot components, fit filters to intended intakes and avoid forcing every opening to act as exhaust. Cable management helps when a cable physically blocks a fan or narrow airflow path; tidy cables alone do not guarantee lower temperatures.
Thermal paste should not be replaced on a calendar alone. Consider it after other checks if an older CPU cooler has been removed, the mounting pressure is suspect, or CPU temperature has deteriorated while case airflow remains good. Removing a cooler can damage pins, sockets or nearby parts, and a poorly remounted cooler can make temperatures worse. Use the cooler manufacturer's method and paste quantity, or have a technician do the work.
When the results point to a hardware fault
Arrange professional diagnosis when:
- thermal throttling persists after safe external cleaning and ventilation checks;
- the PC repeatedly shuts down under load;
- a CPU fan, graphics-card fan or liquid-cooler pump is not operating normally;
- coolant is visible, an AIO makes persistent abnormal noises, or corrosion is present;
- the cooler must be removed or internal wiring is unclear;
- the computer is still under warranty and opening it may affect service options; or
- the test suggests a power-supply fault.
For a desktop that needs a cooler replacement, airflow redesign or a properly controlled load test, Perth Computer Experts offers custom PC builds and hardware upgrades. Bring your sensor log, the exact workload used and any shutdown times; those details are more useful than a single temperature photo and help distinguish cooling from power, software or component faults.
After any repair or cleaning, repeat the same baseline and workload under similar room conditions. A good result is not simply a lower peak temperature: it is stable performance, predictable cooling behaviour and no thermal-limit events during the work you actually need the PC to do.