
How to Create a Bootable USB and Reinstall Windows Safely
Create a Windows 11 bootable USB, protect your files, choose the right reinstall path and restore your computer safely after installation.
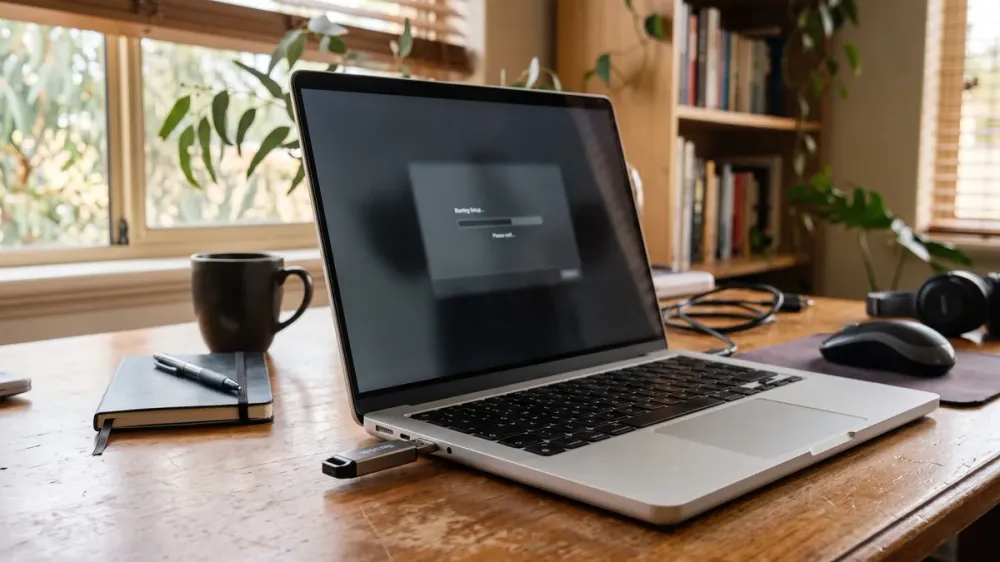
A bootable USB is useful when Windows will not start or its built-in recovery tools cannot solve the problem. It is also a point where one wrong drive selection can erase irreplaceable photos, documents or business records.
This guide explains how to create official Windows 11 installation media, decide whether a USB reinstall is actually necessary, boot from it safely, and restore your files and software afterwards. The steps are written for Perth home users, remote workers and small businesses, with data protection placed before destructive actions.
Key takeaways
- Try the least disruptive Windows recovery option that fits the problem before choosing a clean USB installation.
- Back up and verify important files, save the BitLocker recovery key, and record essential apps before changing or erasing anything.
- Microsoft's Media Creation Tool needs a blank USB flash drive with at least 8 GB; creating the media deletes its existing contents.
- Starting Setup inside Windows may preserve files and apps, but booting from the USB for a clean installation wipes the selected Windows drive.
- If important files were erased or a drive is failing, stop writing to it and seek advice before attempting recovery software or another reinstall.
What a bootable Windows USB does
A bootable USB contains Windows Setup in a form the computer can start independently of the Windows installation on its internal drive. It can install Windows on a new drive, repair or reinstall Windows, or perform a clean installation when the existing system will not start.
It is not the only recovery method. On a working Windows 11 computer, Settings > System > Recovery > Fix problems using Windows Update can reinstall the current Windows version while preserving apps, files and settings. Reset this PC can keep personal files while removing apps and settings. Microsoft places a clean installation from external media among the more disruptive choices, so a USB should not automatically be the first response to every crash or update problem. See Microsoft's current Windows recovery options before deciding.
Use installation media when Windows cannot start and other recovery options fail, when replacing the system drive, or when a clean installation is deliberately required. A clean install may also be appropriate after persistent malware, but isolate the computer and protect accounts first if there is an active compromise.
Before you begin: protect data and access
Do not proceed to USB creation or installation until these checks are complete.
Back up files and verify the copy
Copy documents, photos, desktop files, downloads, email archives, accounting files and other irreplaceable data to a separate external drive or trusted cloud service. A sync service is not automatically a complete backup: confirm the files have finished uploading and open several from the backup location.
Record browser bookmarks or confirm browser synchronisation, note paid application licences, and list specialised programs, printer settings and local email data that must be restored. Small businesses should also check line-of-business databases and shared folders rather than assuming everything lives in Documents.
If Windows will not start, the drive clicks, repeatedly disconnects, produces read errors, or contains important data without a verified backup, stop. Repeated boots, installations and recovery scans can make recovery less successful. Arrange a safe assessment before writing anything else to that drive.
Find the BitLocker recovery key
BitLocker and Device Encryption protect the contents of an encrypted drive. Recovery or firmware changes can cause Windows to request the 48-digit recovery key. Microsoft advises having it available before using Windows Recovery Environment; without the correct key, encrypted data may remain inaccessible. Follow Microsoft's BitLocker recovery-key guidance and confirm the key matches the device.
Do not disable encryption merely to avoid this check. If the key cannot be located and files are not backed up, pause the reinstall.
Check compatibility, edition and activation
Confirm that the computer meets Windows 11 requirements using Windows Update or Microsoft's PC Health Check before attempting Windows 11 installation. Avoid unsupported bypasses, which can leave the computer without reliable support or updates.
Note the installed edition, such as Windows 11 Home or Pro. Reinstalling the matching edition is important for activation. Many modern computers use a digital licence or a product key embedded in firmware, so Windows may activate automatically when the edition matches and the computer reconnects to the internet. Keep Microsoft account details and any separate product key available.
Windows 10 reached end of support on 14 October 2025 and no longer receives normal free security fixes. A Windows 10 installer may still be available for recovery needs, but it is legacy software; check whether the computer can run Windows 11 or whether replacement is the safer long-term option.
What you need to create the USB
Prepare:
- a working Windows PC with a reliable internet connection;
- a blank USB flash drive with at least 8 GB of space;
- the PC being repaired and its power adaptor;
- the verified backup, BitLocker key and licence information; and
- the computer manufacturer's support page or manual for its boot-menu key.
Warning: Microsoft's creation process deletes everything already on the USB. Disconnect other removable drives where practical and identify the intended USB by capacity before selecting it. Do not use the same drive that holds your only backup.
Microsoft's Windows 11 Media Creation Tool creates media for x64 PCs. For an Arm-based Windows device, use the correct official recovery or installation path for that model rather than assuming the same tool applies.
How to create a Windows 11 bootable USB
For a standard Windows 11 reinstall, the official Media Creation Tool is the simplest supported route:
- On the working PC, open Microsoft's Create installation media for Windows page and follow the Windows 11 download link.
- Under Create Windows 11 Installation Media, download the Media Creation Tool.
- Insert the blank USB and run the tool as an administrator.
- Accept the licence terms and confirm the language and Windows edition. If preparing media for a different computer, check that the chosen options suit that computer.
- Select USB flash drive, not ISO file.
- Carefully select the intended USB. Recheck its capacity and drive name because the selected USB will be erased.
- Let the tool download and write the installation files. Do not remove the USB until the tool reports completion, then eject it safely.
Manual formatting is normally unnecessary because the tool prepares the media. Avoid generic instructions to choose FAT32, exFAT, GPT or MBR unless you have a specific compatibility requirement and understand the target firmware. Those choices vary with the installer and device, and a wrong combination can prevent booting. Advanced ISO tools can be useful for specialised cases, but obtain them from their official publisher and do not use options designed to bypass Windows requirements.
How to boot from the USB safely
Connect the computer to mains power, insert the USB, and use the one-time boot menu if available. The key varies by manufacturer and model—often a function key or Delete—so use the manufacturer's documentation rather than repeatedly changing firmware settings.
Select the entry that represents the USB, usually its UEFI entry on a modern computer. If Setup does not appear:
- try another USB port, preferably directly on the computer rather than through a hub;
- return to the working PC and recreate the media;
- test with a known-good USB drive; and
- confirm the model supports the media and the correct boot-menu procedure.
Do not disable Secure Boot as a routine fix. Official Windows 11 media is designed for modern UEFI systems, and changing security or storage-controller settings can cause boot failures or BitLocker recovery prompts. If firmware changes appear necessary, record existing settings and seek model-specific advice.
Choose the reinstall path before clicking Install
The phrase “reinstall Windows” covers several different outcomes. The starting point matters:
- Run Setup from inside a working Windows installation: Windows 11 Setup may offer Keep personal files and apps, Keep personal files only, or Nothing. Review the final Ready to install summary before continuing.
- Use Reset this PC: Windows can reinstall itself without a USB and may offer to keep personal files, but installed apps and settings are removed.
- Boot from installation media: Treat this as a clean installation. Microsoft warns that this route removes files, apps and settings from the selected drive.
Stop before any screen that offers to delete, format or repartition a drive. Confirm the backup again and identify the correct internal drive. If several drives have similar capacities, if the required drive is missing, or if BitLocker status is uncertain, cancel Setup. Disconnecting non-essential internal drives is technician work on many devices; do not open a laptop or power supply unless you are competent and the device is safely isolated.
If you intentionally proceed with a clean installation, choose the matching Windows edition, select only the correct target drive or partition, and follow the on-screen prompts. The computer will restart several times. When it restarts, do not begin the installer again; remove the USB when appropriate or allow the internal Windows drive to boot.
Restore files, apps and settings after installation
A successful Windows install is only the beginning of recovery. Restore in a controlled order so problems are easier to identify.
- Complete Windows setup and connect to a trusted network.
- Run Windows Update repeatedly until no important updates remain, restarting when requested.
- Check Device Manager for missing hardware. Prefer Windows Update and the computer manufacturer's support page for drivers; avoid third-party “driver updater” utilities.
- Confirm Windows activation and that the installed edition matches the licence.
- Install essential applications from Microsoft Store or each publisher's official site. Start with security, browser, productivity and business-critical software rather than bulk-installing old utilities.
- Sign in to cloud storage carefully and confirm which direction synchronisation will run before moving large folders. Avoid creating duplicate folders or overwriting a newer cloud copy.
- Restore personal files from the verified backup in manageable groups, then open representative documents, photos and archives to confirm they work.
- Reconnect printers, scanners and external drives one at a time. Reconfigure email accounts and specialised application data using the vendor's supported process.
- Re-enable or confirm Windows Backup and create a fresh recovery plan once the system is stable.
Do not immediately restore unknown executables or an entire old system image after reinstalling because of suspected malware. Scan retained data and reinstall applications from clean official sources.
What about Windows.old?
Some non-clean upgrade or reinstall paths may place the previous Windows installation in C:\Windows.old. It can contain files from the former installation, but it is temporary and is not a backup strategy. Do not rely on it being created, and do not run Disk Cleanup or Storage Sense until you have checked whether it contains anything needed. A true clean installation that deletes partitions may not leave Windows.old at all.
If files are missing after the reinstall
First check the external backup, cloud recycle bin or version history, and—if it exists—Windows.old. If the missing data was on the internal drive and no verified copy exists, stop using the computer. Installing recovery software onto the affected drive or continuing to download updates can overwrite recoverable data. SSD behaviour, encryption and the type of reinstall can make recovery especially uncertain.
Avoid guarantees and avoid trying a list of recovery programs on valuable data. If the files matter, get professional advice before deciding whether a read-only image or specialist recovery is appropriate. A Perth computer technician can assess whether the situation is suitable for logical recovery or needs a specialist laboratory before more data is written.
Common bootable USB problems
The USB is not listed in the boot menu: recreate it with the official tool, try a direct USB port, and check the manufacturer's boot instructions. Do not guess at firmware security settings.
Setup cannot find the internal drive: stop rather than changing RAID, VMD or storage-controller modes at random. The device may need a manufacturer storage driver, and changing the controller mode can make an existing installation unbootable.
Installation repeatedly fails: recreate the media and try a known-good USB. Persistent failures may indicate memory, storage or other hardware faults; another reinstall is unlikely to fix defective hardware.
Windows will not activate: confirm internet access, the installed Home or Pro edition, and the Microsoft account or product key associated with the device. Do not buy a replacement licence until those checks are complete.
When to stop and get help
Pause the process if important data is not backed up, the BitLocker recovery key is unavailable, the correct target drive cannot be identified, or the computer shows storage errors. Stop immediately for smoke, a burning smell, sparks, liquid exposure, a swollen battery or repeated thermal shutdowns, and disconnect power only when it is safe to do so.
For a routine software problem, remote support may be enough while Windows still starts. A computer that will not boot, a failing drive, or a clean installation normally needs hands-on checks. If you would prefer someone to confirm the backup, create the USB and reinstall Windows, Perth Computer Experts can assess the safest next step before any drive is erased.