
How to Choose the Right Power Supply for Your Computer
Choose a safe, compatible computer power supply by checking wattage, efficiency, connectors, case fit, quality, upgrades and Australian buying rights.
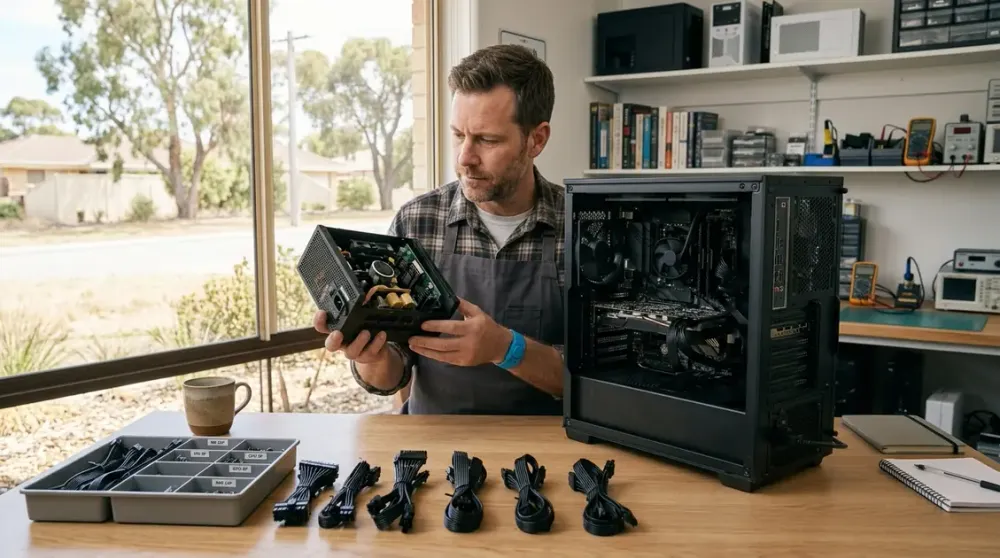
A power supply unit is easy to overlook because it does not increase frame rates or make everyday programs feel faster. Yet every component depends on it. The wrong unit can cause shutdowns under load, limit a graphics-card upgrade or leave you with cables that do not fit; a well-chosen one quietly supplies stable power for years.
Choosing the right computer power supply is therefore less about buying the biggest wattage and more about matching the complete system: peak demand, connectors, case dimensions, expected upgrades, efficiency, protection design and independent test results. This guide explains how to make that decision for a home, gaming, creative or small-business desktop without relying on generic wattage tables.
Key takeaways
- Calculate for the exact CPU and graphics card, then check the graphics-card maker's recommended system power instead of guessing from labels such as “mid-range”.
- Wattage, connector support and physical fit are separate checks; passing one does not guarantee the others.
- 80 PLUS measures conversion efficiency at specified loads, but it does not by itself prove electrical performance, protection quality, noise or reliability.
- Prefer a well-reviewed current model with the protections and native cables your build needs, rather than shopping by brand or wattage alone.
- Never open a PSU, perform live electrical tests or reuse modular cables unless the manufacturer confirms they are compatible with the exact replacement model.
Why the right power supply matters
A desktop PSU converts mains electricity into the regulated DC outputs used by the motherboard, processor, graphics card, storage and fans. Its wattage rating describes the continuous output it is designed to provide under specified conditions; it is not the amount the computer constantly draws from the wall.
If available output, cabling or transient response is inadequate, a demanding game or rendering job may trigger a restart, shutdown or crash. Those symptoms can also come from overheating, memory, drivers or the motherboard, so they do not prove the PSU is faulty. Conversely, a much larger unit does not make the PC faster. It may provide upgrade room, but excessive capacity can simply add cost.
Quality matters as much as the number on the box. A credible review should examine voltage regulation, ripple, protection behaviour, efficiency, temperature and noise. Useful protections commonly include over-current, over-voltage, under-voltage, over-power, short-circuit and over-temperature protection, but abbreviations printed on packaging are not a substitute for competent testing.
How to calculate the wattage you need
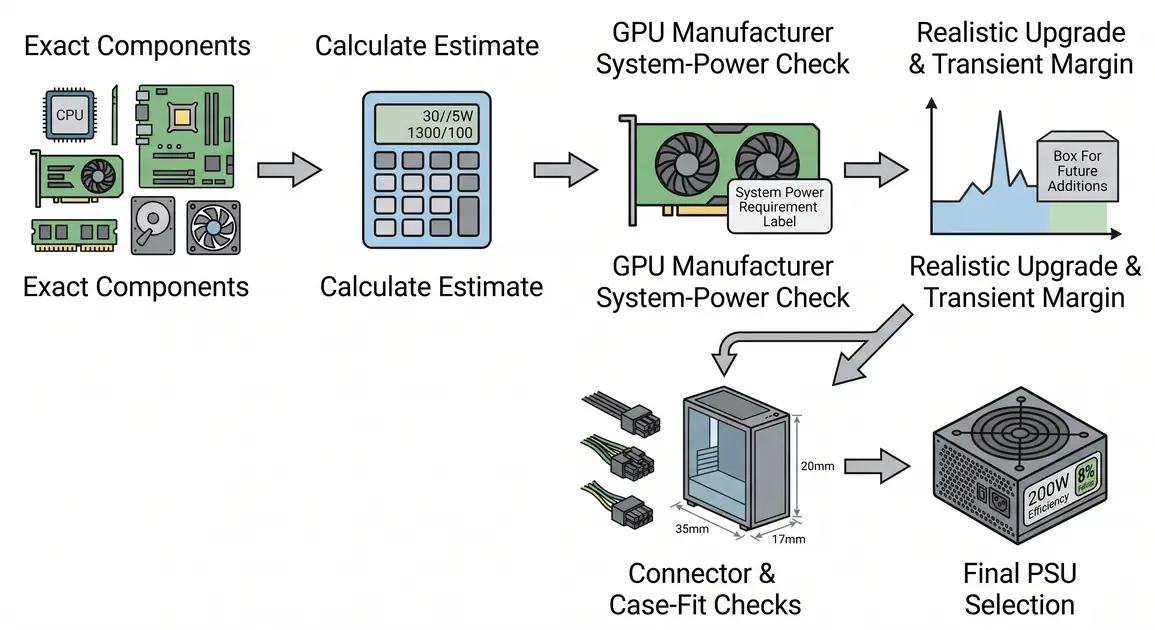
Start with a component-level calculator from a PSU or component manufacturer. Enter the exact CPU and GPU, number of drives, memory modules, fans, pumps and expansion cards. Treat its result as an estimate, because processor power limits, overclocking, graphics-card variants and calculator assumptions differ.
Then make these checks:
- Read the graphics-card manufacturer's specification for recommended system power. This is a whole-PC recommendation based on an example configuration, not the card's own draw. Board-partner versions can differ, so check the exact card you will buy.
- Check the processor's real power limits and the motherboard settings you intend to use, not only the headline TDP or base-power figure.
- Allow for all devices powered internally, including storage, USB-powered accessories, capture cards, fan hubs and liquid-cooling pumps.
- Add sensible margin for component ageing, short power excursions and realistic upgrades. Do not add an arbitrary percentage twice if the calculator or GPU recommendation already includes margin.
- Choose the next suitable standard PSU size only after connector and case checks are complete.
The range between estimated peak demand and the PSU rating is headroom. Enough headroom avoids operating continuously at the limit and can accommodate a planned GPU upgrade. There is no universal “20%” or “30%” rule that fits every build. A basic office PC with no discrete graphics card and a high-end gaming system have very different load patterns and upgrade paths.
Current high-end GPUs show why exact specifications matter. NVIDIA lists its reference GeForce RTX 5090 at 575 W total graphics power and recommends 1000 W system power for its stated test configuration; it also warns that requirements vary with the system and card maker. That is a useful example, not a blanket recommendation for every gaming PC. Always recheck the live specification when selecting parts.
Understand efficiency without overestimating it
Efficiency is the proportion of input power delivered to the computer rather than lost mainly as heat. If two units provide the same DC output, the more efficient one normally draws less power from the wall and has less waste heat to remove.
The official 80 PLUS tables set minimum efficiencies at defined percentages of rated load. The thresholds differ between 115 V and 230 V test categories, which is why old articles often quote conflicting Bronze or Gold numbers. For 230 V EU internal non-redundant units, for example, the published Gold thresholds are 90% at 20% load, 92% at 50% and 89% at full load. Those figures should not be casually applied to a unit certified under a different input category.
For many home and gaming builds, a genuine Gold-certified model can be a sensible balance of efficiency, price and availability. Bronze is not automatically unsafe, and Platinum or Titanium is not automatically better value. Estimate how long the machine will operate and at what load before paying a premium. A workstation that renders for hours can benefit more from a small efficiency improvement than a family PC that spends most of its time idle.
Most importantly, an efficiency badge does not assess every aspect of PSU quality. Use the official certification database to confirm the exact model, then consult technically competent independent reviews for electrical performance, protection behaviour and noise.
Check the standard, connectors and cable count
Connector compatibility is now one of the most important buying checks. List the sockets required by the motherboard, CPU and GPU before ordering:
- a 24-pin ATX motherboard connector;
- the required 4+4-pin EPS/CPU connectors near the processor socket;
- the correct number of conventional 6+2-pin PCIe connectors, if used;
- a native 12V-2x6 cable when required by a current high-power graphics card; and
- enough SATA power connectors for drives, hubs or other accessories.
The 12V-2x6 connector defined in PCI Express CEM 5.1 replaces 12VHPWR. Do not assume that any PSU advertised as “PCIe 5 ready” includes the native cable or power capacity your exact GPU requires. Check the PSU specification and the graphics-card documentation. Where an approved adapter is supplied, follow the card maker's instructions, use the specified number of separate PSU leads and leave enough case clearance to avoid a tight bend at the plug.
Seat every power connector fully and evenly. Stop if a plug will not insert without force, if the latch will not engage or if the cable must be sharply bent against the case panel. Do not use CPU/EPS and GPU/PCIe plugs interchangeably just because parts of their shapes look similar.
ATX 3.x power-supply guidance is designed around current platform needs, including defined power-excursion behaviour. For a new performance build, an appropriately specified current unit is usually a cleaner choice than adapting an old PSU. An older, good-quality PSU may remain usable in a modest compatible system, but age, warranty status, connector availability and the exact GPU requirements all need review.
Never mix modular power-supply cables
Fully modular and semi-modular sockets are not universally pinned at the PSU end. A cable may physically fit another model and still route voltage to the wrong pins. Use only the cables supplied for the exact PSU or cables the manufacturer explicitly lists as compatible with that model. When replacing a modular PSU, remove the old modular cables as well as the unit.
Match the PSU to the case
Form factor and length are physical compatibility questions. ATX is common in standard desktop cases, while SFX and SFX-L serve compact builds. A case may support more than one format with a bracket, but that does not guarantee every unit will fit.
Check the case manual for supported PSU formats and maximum length. Then allow extra space for modular plugs and cable bends, especially if a drive cage sits in front of the PSU. In small-form-factor builds, also check cable length: compact PSU cable sets may not reach comfortably in a larger case.
Mount the fan towards a filtered external vent when the case is designed for it, otherwise follow the case and PSU manuals. Do not block the intake, and do not assume a higher-wattage unit will run cooler in a case with poor airflow.
Choose modularity, noise and warranty to suit the build
A fully modular PSU lets you connect only the cables required. A semi-modular model permanently attaches a few core leads, while a non-modular unit permanently attaches all of them. Modularity mainly affects installation and cable management; it does not make a PSU electrically superior.
For a roomy budget build, unused fixed cables may be easy to secure. For a compact PC, full modularity can make assembly considerably easier. Whichever design you choose, route cables so they do not obstruct fans or pull sideways on connectors.
If quiet operation matters, check noise measurements across the loads you expect rather than relying only on a “zero RPM” label. Semi-passive modes can stop the fan at light load, but fan quality and control under sustained load determine how the unit sounds during gaming or rendering.
A longer manufacturer warranty can be a useful confidence signal, but it is not proof of performance. Confirm the warranty for the exact model and Australian purchase channel. Under Australian Consumer Law, consumer guarantees are automatic and separate from voluntary warranties; depending on the circumstances, rights may continue beyond the written warranty period. Buying from an Australian retailer can also make the practical remedy process simpler, although the ACCC says overseas businesses selling directly to Australian consumers must follow Australian Consumer Law.
A practical PSU buying checklist
Before placing an order, confirm all of the following:
- The wattage covers the exact configuration and the GPU maker's system-power guidance.
- Upgrade headroom reflects a realistic plan, not a vague wish to “future-proof”.
- The exact model has the required CPU, GPU, motherboard and accessory connectors.
- A current GPU gets a native 12V-2x6 cable where appropriate, or you have an approved adapter arrangement with adequate clearance.
- The PSU format, body length, plug clearance and cable lengths fit the case.
- The exact model appears in the claimed efficiency certification database.
- Independent technical reviews cover electrical performance, protections, temperature and noise.
- The warranty and seller are suitable for an Australian purchase.
- Every modular cable belongs to that exact PSU model or is explicitly approved as compatible.
- The total price reflects quality and suitability, not merely the largest wattage available.
Avoid selecting on brand alone. Large brands sell multiple platforms and quality tiers, and models can change over time. Model-specific evidence is more useful than a list of supposedly safe manufacturers.
Install or replace a PSU safely
PSU replacement involves mains-powered equipment and expensive components. Back up important files before hardware work where practical, shut the computer down, turn the PSU switch off, unplug the mains lead and disconnect other cables. Work on a stable, dry surface and follow the case, motherboard, graphics-card and PSU manuals.
You may mount a replacement unit and connect documented plugs if you are competent and comfortable doing so. Double-check the 24-pin motherboard, EPS/CPU and GPU connections before applying power. Never force a connector, and never improvise with an unapproved splitter or modular lead.
Stop immediately if there is smoke, sparking, a burning smell, melting or discolouration at a connector, liquid exposure, damaged mains wiring or evidence of overheating. Disconnect power only if it is safe to do so and seek qualified help. Do not repeatedly power the computer on to “see if it clears”.
Never open the metal PSU enclosure or attempt an internal repair. High voltages can remain present and manufacturers identify no user-serviceable parts inside. Do not probe a live PSU, bridge connectors for informal testing or perform live mains measurements. Those tasks belong with appropriately trained technicians and suitable test equipment.
If a PC already restarts or shuts down, diagnosis should come before buying a part because overheating, a failing GPU, memory faults and motherboard problems can look similar. Perth Computer Experts can help with custom PC builds and hardware upgrades, including compatibility checks and assembly. A careful specification now is cheaper and safer than replacing the wrong component later.