
How to Build a Custom Gaming PC in Perth
Plan, choose, assemble and safely troubleshoot a custom gaming PC with current compatibility advice and practical considerations for Perth homes.
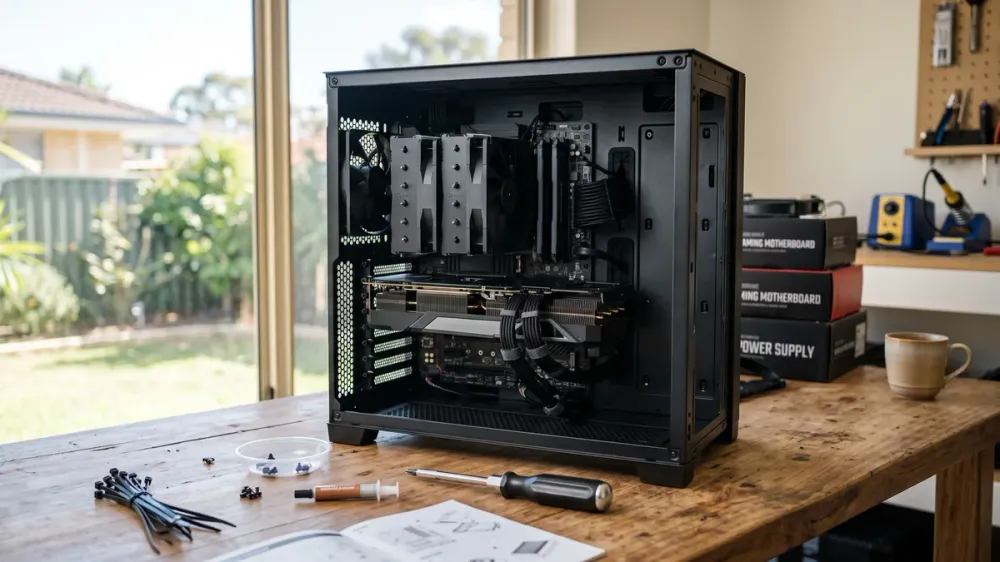
A successful gaming PC build starts before the first box is opened. The biggest risks are rarely the screwdriver work itself; they are mismatched parts, an unrealistic performance target, poor power or cooling choices, and changing too many things at once when the first boot does not go to plan.
Building your own gives you control over those decisions, but a well-specified pre-built system can still be the better choice if you value one warranty and less setup time. This guide takes you from deciding whether to build through choosing compatible parts, assembling them safely, installing Windows and diagnosing common first-boot problems. It is written for a first-time builder who wants a dependable gaming PC, not a showcase assembled around the most expensive components.
Key takeaways
- Set a target resolution, refresh rate, games and total budget before comparing parts.
- Verify the CPU socket, motherboard firmware, RAM type, clearances, power connectors and cooling as one system.
- Keep the PC disconnected from mains power during assembly, never open a power supply, and never mix modular PSU cables.
- On first boot, change one thing at a time and use the motherboard manual and diagnostic lights before assuming a part is faulty.
- Perth's hot summers make case airflow, room temperature and regular filter cleaning practical design considerations.
Custom build or pre-built: which suits you?
A custom build lets you allocate money to the parts that affect your games, select the exact power supply and cooling, avoid unwanted bundled software, and choose a case and motherboard that leave room for sensible upgrades. It is also a useful way to understand how the machine works.
Those advantages are not automatic savings. Individual component prices move, Windows may need to be budgeted separately, and each part can have its own warranty process. You also take responsibility for compatibility, assembly, firmware configuration and fault isolation. Overclocking is optional, can increase heat and power use, and may affect warranty coverage; it is not required for a good gaming PC.
A pre-built system is reasonable when you want one supplier to assemble, test and support the complete machine. Compare the exact component models, not just “Core i7”, “Ryzen 7” or “RTX graphics”. Check the power-supply model and wattage, number and arrangement of RAM modules, motherboard expansion, case ventilation, storage model and warranty terms. A custom system is the stronger fit when control and upgradeability matter; a transparent, well-balanced pre-built can be the lower-effort choice.
Plan performance and budget before choosing parts
Start with the games you play and their recommended requirements, then define the monitor target: 1080p, 1440p or 4K; visual quality; and refresh rate. Competitive games at 1080p and very high frame rates can place more pressure on the CPU, while graphically demanding games at 1440p or 4K usually shift more of the work to the GPU. Reviews should test the games and resolution relevant to you.
Set one total budget that includes the tower, Windows licence if required, monitor, keyboard, mouse, headset, delivery and any assembly or testing. The GPU will often take the largest share of a gaming build, but there is no universal percentage. Spending heavily on it while accepting an unsuitable PSU, single small RAM module or airflow-restricted case creates a poorly balanced machine.
Think in upgrade paths, not “future-proof” promises. Useful headroom means a PSU with appropriate capacity and connectors, spare storage slots, enough case clearance and a platform that supports a realistic next upgrade. Paying for features you cannot identify a use for is not future-proofing.
Choose compatible gaming PC components
The component list is straightforward: CPU, CPU cooler, motherboard, RAM, graphics card, storage, power supply, case, case fans, operating system and peripherals. Compatibility is the difficult part.
CPU and motherboard platform
The CPU affects simulation, game logic, minimum frame rates, background tasks and high-refresh gaming. More cores can help streaming and content creation, but model-specific gaming benchmarks are more useful than comparing core count or clock speed alone.
Choose the CPU and motherboard together. AMD's AM5 platform supports Ryzen 7000, 8000 and 9000 desktop processors across compatible AM5 boards, although an older board may need a firmware update for a newer CPU. Current Intel Core Ultra 200S desktop processors use LGA1851 and Intel 800-series chipsets; they are not compatible with older LGA1700 boards. These platform details are current at publication, but always confirm the exact CPU on the motherboard manufacturer's support list and note the minimum firmware version before ordering (AMD AM5 compatibility; Intel Core Ultra desktop compatibility).
Check that the board supplies the ports and slots you need: enough M.2 storage positions, suitable rear USB, wired network or Wi-Fi, fan headers and an accessible primary PCIe slot. ATX, Micro-ATX and Mini-ITX describe board sizes; the case must support the chosen size.
Graphics card and monitor
Choose the GPU using independent benchmarks for your games, target resolution and quality settings. VRAM requirements vary by game, texture setting and resolution, so a universal number quickly becomes misleading. Check the game's current recommendations and the card's measured performance instead.
Confirm three physical details: GPU length, thickness measured in slots, and clearance for its power cable and front-mounted fans or radiator. Heavy cards should use the supplied support bracket where one is provided. Connect the monitor to the graphics card, not the motherboard video socket, unless you are deliberately testing integrated graphics.
RAM and storage
For a new gaming build, 32 GB of RAM is a comfortable starting point for modern games plus background applications; 16 GB can still suit lighter games and a tighter budget. Buy a matched kit listed as compatible where practical, install it in the motherboard's recommended slots, and do not assume two separately purchased kits will run together at their advertised speed. DDR4 and DDR5 are physically and electrically different, so the motherboard determines which type you need.
XMP and EXPO memory profiles are optional performance settings. First confirm a stable boot at defaults. Enabling a profile later may require a longer memory-training boot and is technically memory overclocking, so use a profile supported by the board and CPU rather than treating the advertised kit speed as guaranteed.
An M.2 NVMe SSD is the sensible main drive for Windows and games. PCIe generation indicates the interface ceiling, not the experience by itself: capacity, price, sustained behaviour, warranty and the workload also matter. Check whether populating particular M.2 slots disables a SATA port or shares PCIe lanes; the motherboard manual is authoritative. A hard drive can still provide economical bulk storage, but it is a poor choice for the primary game and operating-system drive when an SSD fits the budget.
Power supply
Size the PSU from the actual CPU and GPU recommendations, then allow sensible headroom for transient loads, ageing and a planned upgrade. Efficiency certification describes conversion efficiency; it is not, by itself, proof of electrical quality. Use professional reviews and the manufacturer's protections and warranty when comparing models.
Check the exact GPU connector. Where a card uses 12V-2x6, follow the card and PSU instructions, push the plug fully home until it is locked, and avoid force or a sharp bend close to the connector. Seasonic's cable guidance explicitly requires a fully inserted, click-locked connection and warns against bending close to the plug (12V-2x6 cable instructions).
Never reuse modular cables merely because they fit. The PSU-side pinout is not universal, even between some models from the same brand; use only cables confirmed for that exact unit (Corsair PSU cable compatibility guidance). Never open a PSU: hazardous charge can remain inside even when it is unplugged.
Case and cooling
Verify motherboard support, GPU dimensions, air-cooler height, radiator dimensions and thickness, PSU length, drive bays and fan positions. A mesh intake and removable filters can make maintenance easier. An air cooler is reliable and sufficient for many mainstream CPUs. An all-in-one liquid cooler can suit a high-power CPU or space-constrained layout, but adds pump, radiator and tubing considerations. Choose from the CPU's thermal requirements and case compatibility, not appearance alone.
A simple airflow path usually works well: filtered front or lower intake, with rear or upper exhaust. The exact arrangement depends on the case. Check the arrow markings on each fan and connect the CPU cooler fan to the CPU_FAN header so the motherboard can monitor it.
Perth Metro's long-term mean maximum is about 31–32°C in January and February, so room temperature can materially reduce cooling headroom (Bureau of Meteorology climate statistics). Do not hide a high-power PC in a closed cabinet. Keep filters accessible, clean them when visibly dusty, and judge cooling under the hottest room conditions in which you expect to play.
Run a compatibility check before buying
Make a table of every model number and verify it against manufacturer specifications. A compatibility website can catch obvious conflicts, but it cannot reliably judge every firmware revision, cable bend, radiator-and-RAM collision or shared-lane limitation.
Confirm all of the following:
- CPU socket, chipset support and required motherboard firmware
- DDR generation, kit capacity, supported module layout and cooler clearance
- GPU length, thickness, support bracket, PSU capacity and connector type
- Case support for the board, PSU, cooler, radiator, fans and drives
- Enough motherboard storage slots, USB ports, networking and fan headers
- Monitor resolution, refresh rate and available GPU display outputs
- Windows 11 compatibility, including supported CPU, UEFI, Secure Boot capability and TPM 2.0
Keep invoices and packaging until the build passes stability tests. If a board needs a firmware update before it can recognise the CPU, check whether it supports updating without an already-compatible processor. Firmware updates can leave a motherboard unusable if interrupted, so follow that board's manual exactly and use professional help if you are uncertain.
Prepare a safe workspace and tools
Use a large, clean table with good lighting and a hard, non-carpeted floor. Gather a Phillips screwdriver, the component manuals, cable ties or reusable straps, and a small container for screws. Keep drinks away. Handle boards by their edges and avoid touching contacts or socket pins. Intel's current build guide likewise recommends an uncarpeted workspace and consulting the relevant manuals (Intel gaming PC build guide).
Switch the PSU off and disconnect its mains cable before installing, removing or reseating anything. An antistatic wrist strap should be attached as its instructions specify; otherwise discharge static frequently against an appropriate grounded metal object before handling parts. Do not work during an electrical storm.
Stop immediately if you notice smoke, sparks, a burning smell, melted connectors, liquid exposure or exposed mains wiring. Switch off at the wall if safe, disconnect power, and have the equipment assessed. Do not open the PSU or perform live electrical tests.
Assemble the PC step by step
Exact latch, bracket and cable designs vary, so the motherboard, cooler, case, GPU and PSU manuals take precedence over a generic sequence.
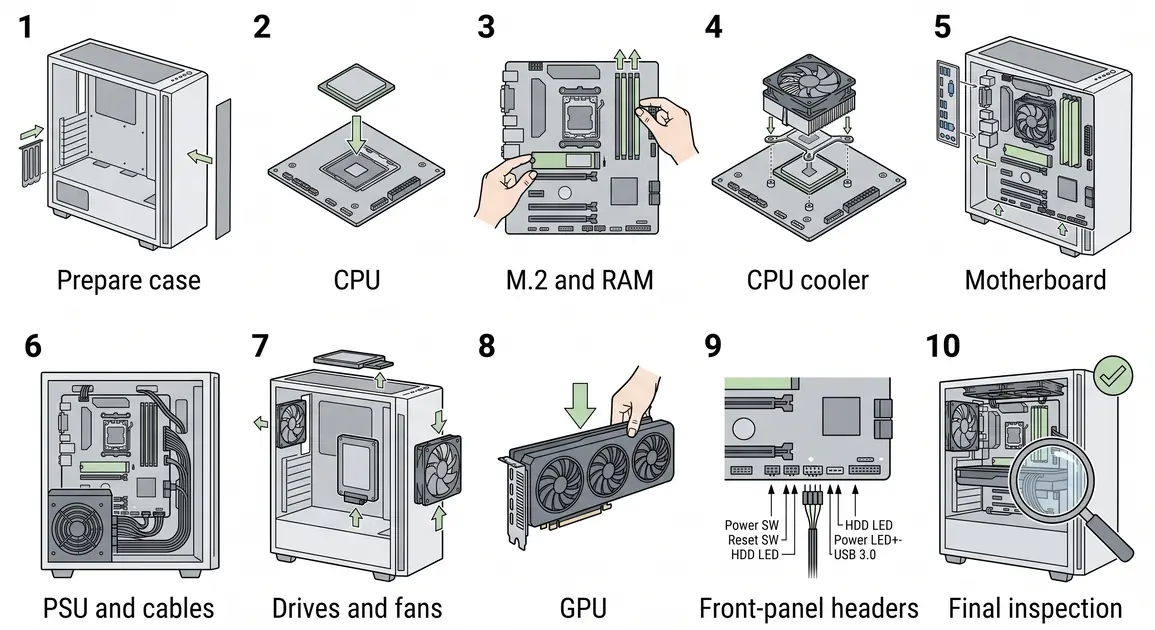
- Prepare the case. Remove the panels, identify the accessory box, confirm the correct motherboard standoffs are installed, and remove any extra standoff with no matching board hole.
- Install the CPU. Place the motherboard on its box or another firm non-conductive surface. Open the socket, align the marked corners and lower the CPU without sliding or forcing it. Close the retention mechanism as the motherboard manual shows.
- Install the M.2 SSD and RAM. Use the board's preferred M.2 position and retain its heatsink pad film instructions. Align the RAM notch and populate the recommended slots—commonly A2 and B2 for two modules, but verify this in the manual.
- Fit the CPU cooler. Remove any protective film from the cold plate. Use pre-applied paste or the amount and pattern specified by the cooler maker, not both. Tighten opposing screws gradually for even pressure and connect the fan or pump to the specified header.
- Mount the motherboard. Fit the I/O shield first if it is not integrated, lower the board onto the standoffs, and tighten screws until secure without overtightening.
- Install the PSU and route cables. Use only the unit's confirmed cables. Route the 24-pin motherboard, CPU EPS, GPU, SATA and fan power cables before access becomes crowded. Do not confuse CPU/EPS and PCIe cables.
- Install storage drives and case fans. Secure each drive and confirm fan direction. Keep cables away from fan blades.
- Install the graphics card. Use the primary x16 slot specified by the board, remove the necessary case slot covers, seat the card evenly until latched, screw it to the case and fit its support. Attach each required power connector exactly as the manuals specify.
- Connect front-panel controls and USB/audio headers. These small connectors are easy to misplace. Use the labelled diagram in the motherboard manual; never force a keyed plug.
- Inspect before power-up. Confirm there are no loose screws, tools or cables in fans; both motherboard power connectors are seated; the CPU cooler is connected; RAM and GPU latches are engaged; and the monitor is connected to the intended output.
First boot, firmware and Windows 11 setup
For the first boot, leave the side panel accessible, connect only the monitor, keyboard and power, then switch on. Initial DDR5 memory training can take longer than an ordinary boot. Check the motherboard manual before interrupting it; repeated forced shutdowns can make diagnosis harder.
Enter UEFI setup and confirm the CPU, total RAM and storage are detected. Check temperatures before changing performance settings. If the temperature rises rapidly or the system repeatedly shuts down, power off and inspect the cooler mounting and fan connection.
Install Windows 11 from official Microsoft media, then install current motherboard chipset/network and GPU drivers from their manufacturers. Windows 11 requires a supported processor, UEFI with Secure Boot capability and TPM 2.0 (Microsoft Windows 11 requirements). Windows 10 reached end of support on 14 October 2025; Microsoft says it no longer receives ordinary security updates unless an applicable Extended Security Updates path is used, so it is not the sensible default for a new gaming build (Microsoft Windows 10 support notice).
Before enabling XMP/EXPO, performance enhancement or overclocking, complete Windows Update, verify normal temperatures and test the system at defaults. Create a restore point or backup once the installation is stable. Change one setting at a time so you can reverse it if instability appears.
Troubleshoot common first-boot problems safely
Use the motherboard's debug LEDs, display code or beep pattern and its manual. Photograph connections before unplugging them, keep the PSU disconnected while reseating parts, and change only one variable per test.
No power at all
Confirm the wall outlet or power board works with a known-safe device, the PSU's rear switch is on, the mains lead is seated, and the case power-switch lead is on the correct header pins. With mains disconnected, press the 24-pin motherboard and CPU EPS connectors firmly into place. Do not perform a paperclip test, probe live connectors or open the PSU. A suspected PSU should be tested with suitable equipment by a competent technician or substituted with a known-compatible unit and its own cables.
Fans or lights, but no display
Confirm the monitor is powered, on the correct input and connected to the graphics card. Turn off and unplug the PC, then reseat the GPU and its power leads. Reseat one RAM module in the manual's recommended single-module slot and try each module separately. If the CPU has integrated graphics, remove the discrete GPU and test the motherboard output; not every CPU provides integrated graphics.
New boards may take several minutes for first memory training. Follow the board's diagnostic indicator rather than repeatedly cycling power. Inspecting a CPU socket is reasonable only with power disconnected and good light; do not attempt to straighten pins if you are not confident.
It boots but runs hot or shuts down
Stop stress testing after a thermal shutdown. With power disconnected, verify the cooler fan or pump header, mounting pressure, protective-film removal and fan direction. If the cooler must be removed, clean and replace thermal paste according to its instructions. Confirm that intake filters are clear and the case is not recirculating hot air in a cupboard. Temperature limits differ by CPU and GPU model, so compare readings with the manufacturer's specification rather than relying on one universal threshold.
Parts do not fit or a connector will not seat
Do not force it. Recheck orientation, case clearances, board form factor and the manual. A misplaced motherboard standoff can short the board. A cable labelled CPU/EPS is not interchangeable with a PCIe GPU cable simply because both may have eight pins. If a cooler, radiator or GPU conflicts with another part, replace or reposition only in a configuration approved by the component makers.
Still no POST
Return firmware settings to defaults using the motherboard's documented Clear CMOS method, with mains power disconnected. This resets firmware settings and may change boot order, fan curves and memory profiles, but does not erase files from the SSD. Then test a minimal configuration: motherboard, CPU and cooler, one RAM module, PSU, and graphics only if the CPU lacks integrated graphics. Add one component at a time after a successful POST.
If you encounter a burning smell, visible damage, liquid, repeated thermal shutdowns, or a power connector that has discoloured or melted, stop. If safe checks do not isolate the fault, swapping parts blindly can cost more than a proper diagnosis.
Finish the build and plan maintenance
After the system is stable, route cables behind the motherboard tray without crushing them or pulling on sockets, secure loose runs clear of fans, and refit the panels. Record the component models, serial numbers, firmware version and which PSU cables belong to the machine. Keep recovery keys and installation details somewhere separate from the PC.
Recheck temperatures and stability after the panels are fitted because closed-case airflow can differ from an open test. Clean external filters when visibly dusty, inspect fans periodically, and update drivers or firmware for a specific compatibility, security or stability reason rather than changing everything immediately before an important gaming session.
If you want a parts list checked, an existing gaming PC upgraded, or the complete system assembled and tested, Perth Computer Experts offers custom PC builds and hardware upgrades. Bring the games, monitor target and budget you have in mind; those details are more useful than asking for the “best” PC in the abstract.